Depending on the installation method used either start the pure::variants-enabled Eclipse or under Windows select the item from the menu.
If the Variant Management perspective is not already activated, do so by selecting it from -> in the menu.
The import of a VEL description is started by selecting the action either in the context menu of the pure::variants Project view or with menu in the File menu. Select Variant Models or Projects in the opened wizard and press Next. On the following page select Import from VEL document. After pressing Next a page opens, where the source VEL document and the target folder of the family model to be created is selected.
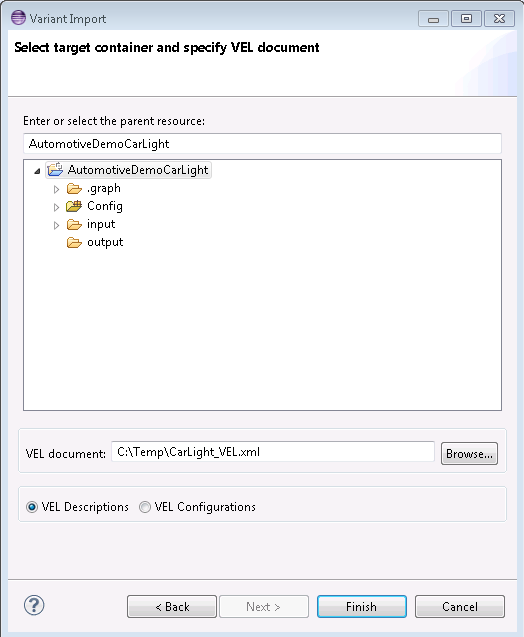
After pressing Finish the import is performed and one family model per variability exchange model is generated. The resulting models will created in the selected target folder.
The Family Model editor for this type of models contains a special viewer. The VEL Description viewer shows in a compact way the variation points, the variations and their conditions by hiding all unnecessary information from the user. The full model can be seen in the Tree tab.
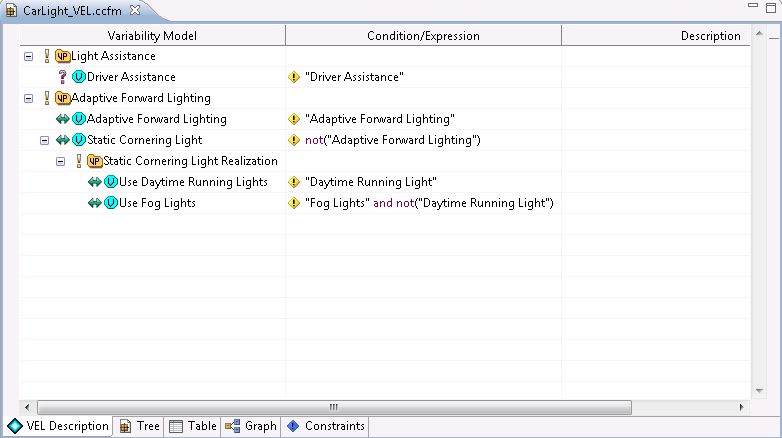
The VEL Description viewer supports the user by creating, changing, or deleting of conditions and expressions at a variation.
An imported VEL description family model can be changed within pure::variants. In order to be able to share a changed VEL description pure::variants supports the export of VEL description models to an VEL description XML file.
The export of a VEL description is started by selecting the action either in the context menu of the pure::variants Project view or with menu in the File menu. Select Variant Resources in the opened wizard and press Next. On the next page select the model, which shall be exported, and switch to the next page. Select Export to VEL document and press Next.
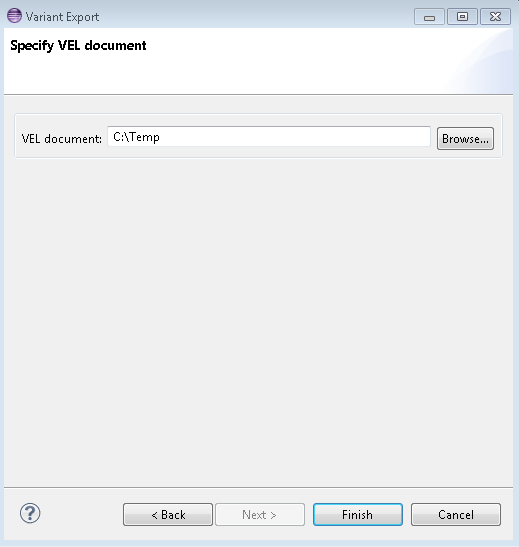
The last page of the wizard allows the user to select a target folder, in which the generated VEL description document will be stored.
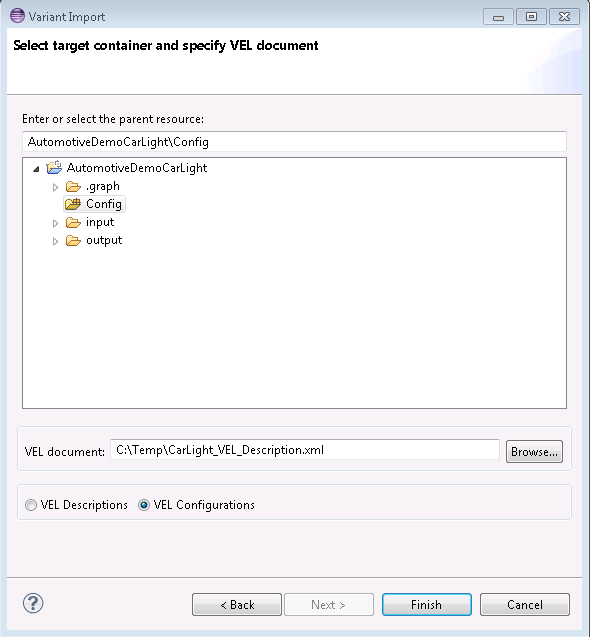
The import of a VEL configuration is started by selecting the action either in the context menu of the pure::variants Project view or with menu in the File menu. Select Variant Models or Projects in the opened wizard and press Next. On the following page select Import from VEL document. After pressing Next a page opens, where the source VEL document and the target folder of the variant description model to be created is selected. The target folder has to be a configuration space folder.
Note
Before a VEL configuration can be imported the corresponding VEL description has to be imported to pure::variants. All resulting family models need to be added as input models to the target configuration space.
After pressing Finish the import is performed and one variant description model is generated within the target configuration space. Each variation, which is selected in the imported VEL configuration will be user selected in the resulting variant description model.
The Varint Model editor for variant description models containing at least one VEL description family model contains a special viewer. The VEL Configuration viewer shows in a compact way the variation points, the variations and their conditions by hiding all unnecessary information from the user. The full model can be seen in the Family Models tab. Besides the selections the tab shows the resulting value of the variation points and give indications on which condition is evaluated to true by a small green icon. Conditions with an red icon evaluate to false.
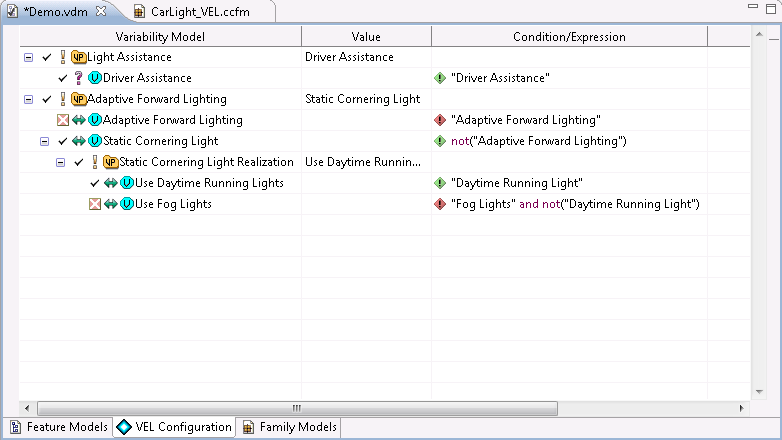
The VEL Configuration viewer supports the user by selecting variation(s) for a variation point.
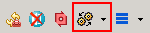
To create a VEL configuration document a transformation module is used. First a Transformation Configuration has to be created. To create a Transformation Configuration click on Transformation button in the tool bar (see Figure 7, “Transform model”) and choose Open Transformation Config Dialog...
The configuration space property dialog opens and the Transformation Configuration tab is shown. Next step is to add a new Module Configuration, by clicking the marked tool bar item (see Figure 8, “Transformation Configuration”). Now add a new Module to the Module Configuration, using the Add button.
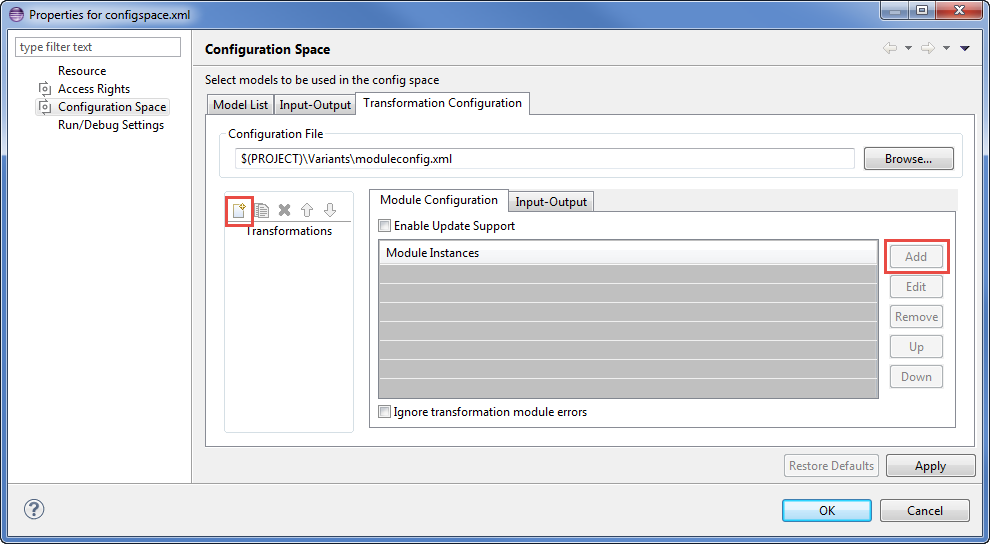
A new dialog comes up, choose VEL Configuration Writer module and enter a name. This transformation module provides one parameter. On the next page the output path for the generated VEL configuration document can be given. It is allowed to use pure::variants path variables here.
After finishing the dialogs the transformation can simply be used by clicking on the Transformation button (see Figure 7, “Transform model”) in the tool bar and choosing the transformation in the pull down menu.