As of pure::variants 5, it is possible to customize the variant configuration process with the help of a Variant Configuration Wizard. A configuration space that is intended to use a Variant Configuration Wizard has to be configured with a Variant Configuration Wizard Model . See the section called “ Guided Variant Configuration ” for detailed information about the Variant Configuration Wizard.
This section describes how to create and configure the Variant Configuration Wizard Model.
Start the New Variant Configuration Wizard Model (VCWM) wizard from the New menu of the context menu in the Variant Projects view. The following wizard opens. On the first page select a target container and define the name for the new Variant Configuration Wizard Model.
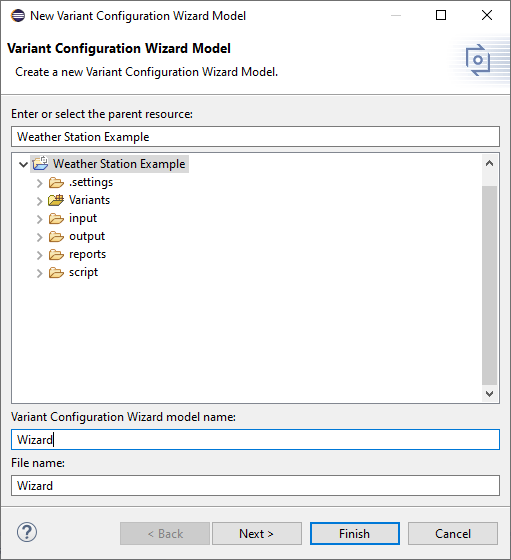
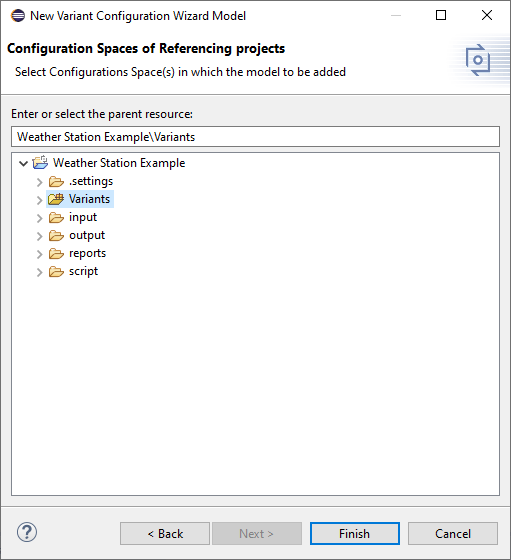
The wizard can be finished now and the new Variant Configuration Wizard Model will be created. Using the Next > button instead switches to the next page where it is possible to select the configuration spaces to which the new model will be added automatically. The page lists configuration spaces from the target project and all projects which reference the target project. The configuration spaces to which the Variant Configuration Wizard Model is added can also be changed later on. See the following section for more information on how to do that.
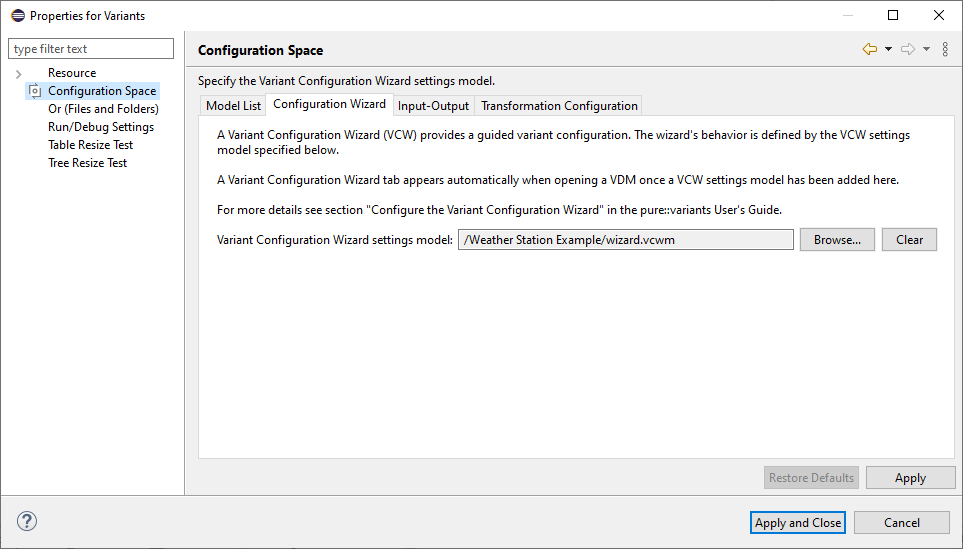
To add a Variant Configuration Wizard model to a configuration space, open the properties of the configuration space and navigate to the Configuration Wizard tab. The Variant Configuration Model is selected with the Browse ... button. The Clear button allows the user to remove a Variant Configuration Model from the confguration space.
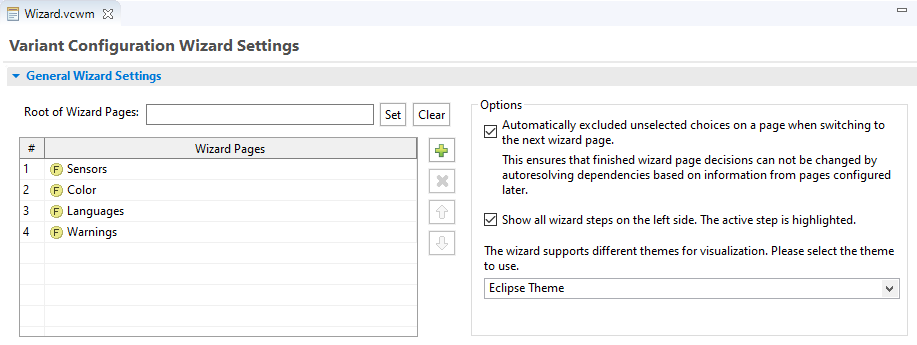
The Variant Confiuration Wizard Model provides options to configure the Variant Configuration Wizard. These options are configured in the Variant Configuration Wizard Model editor. The editor is divided into 3 sections, the General Wizard Setting section at the top, the Start Page Section in the middle and the Finish Page Section at the bottom of the editor.
The General Wizard Settings section defines the configuration step wizard pages that will be displayed on the left side of the wizard. The pages can be defined in two ways. The first way is to select the Root of Wizard Pages using the Set button. All direct children of this element are automatically added as configuration pages. The resulting wizard pages are listed in the table below. Sorting or removing them is not possible. The Clear button removes the selected root element. If a root element is already defined, clicking Clear will discard all previously defined Wizard Pages .
The second way to define the wizard pages is to select the defining elements manually. Use the plus icon next to the table to add wizard pages. Each entry in the table will be one wizard page in the wizard. The order in the table is also the order of the pages in the wizard. The table allows to sort the entries using the up and down buttons as well as to remove elements using the x button.
The right side defines general options for the wizard's behavior. If the first option is enabled the wizard automatically excludes all non-selected elements when the user switches from one wizard page to the next. This prevents the auto resolver from automatically selecting elements (based on rule knowledge from the input models) whose configuration was already completed in a previous configuration step.
The second option in the right half of the General Wizard Settings section enables or disables the navigation part of the Variant Configuration Wizard. If this option is selected, the resulting wizard will show the list of configuration steps. Otherwise, the configuration steps will be hidden.
Finally, if more than one wizard theme is available, then the desired theme can be selected with the combo box of the third option.
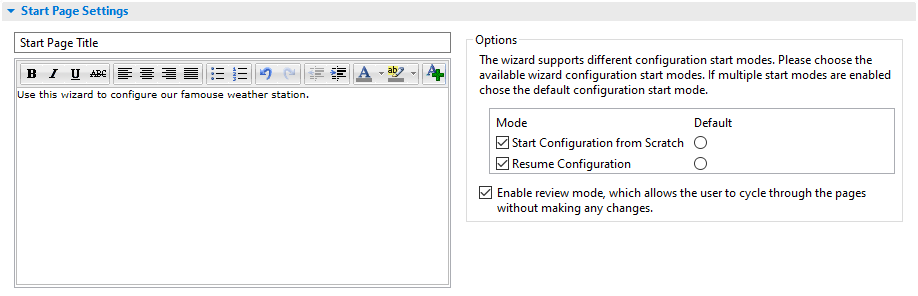
The Start Page Settings section defines the user message and the page title on the left side. The right side of the section defines which start page options will be available on the start page and, if more than one mode is selected, the default mode needs to be specified.
Selecting Enable review mode enables the review mode. This is the default start mode of the wizard, but this can be changed by the user, if at least one other start mode is available.
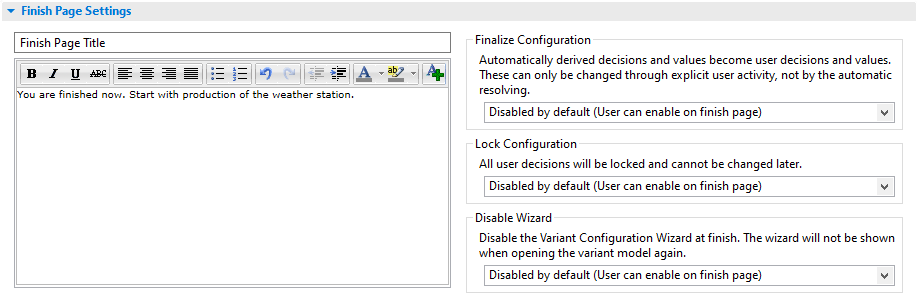
The Finish Page Settings section defines the user message and the title of the final wizard page, as shown in the list of configuration steps on the left side. The right side of the Finish Page Settings section defines which finishing options will be presented to the user on the finish page and which one is the default. Three options are available. Finalize Configuration , Lock Configuration and Disable Wizard . The meaning of each of these options is explained on the right side of the Finish Page Settings section (see Figure 6.78, “VCWM Editor Finish Page Section” ). The combo boxes below each option allow to choose if and how an option is presented on the wizard's finish page. The choices are Disabled by default , which means that the option is disabled on the finish page but the user can select it, Enabled by default , which means that the option is enabled on the finish page but the user can deselect it, Always disabled , which means that the option is disabled and not shown on the finish page and, finally, Always enabled , which means that the option is enabled and not shown on the finish page.