In the context of pure::variants, Model Validation is the process of checking the validity of feature, family, and variant description models. Two kinds of model validation are supported, i.e. validating the XML structure of models using a corresponding XML Schema and performing a configurable set of checks using the model check framework.
This model validation uses an XML Schema to check if the XML structure of a pure::variants model is correct. This is pure syntax check, no further analyses of the model are performed.
The XML Schema model validation is disabled per default. It can be enabled selecting option "Validate XML structure of models..." on the Variant Management->Model Handling preferences page (menu Window->Preferences ). If enabled all pure::variants models are validated when opened.
Note
Invalid models will not be opened correctly if the XML Schema model validation is enabled.
For more information about XML Schema see the W3C XML Schema Documentation .
The model check framework allows the validation of models using a configurable and extensible set of rules (called "model checks"). There are no restrictions on the complexity of model checks.
The model check framework is configured on the Variant Management->Model Validation preference page (menu ). On the Check Configurations tab the model check configurations can be managed and activated (seeFigure 6.29, “Model Validation Preferences Page” ).
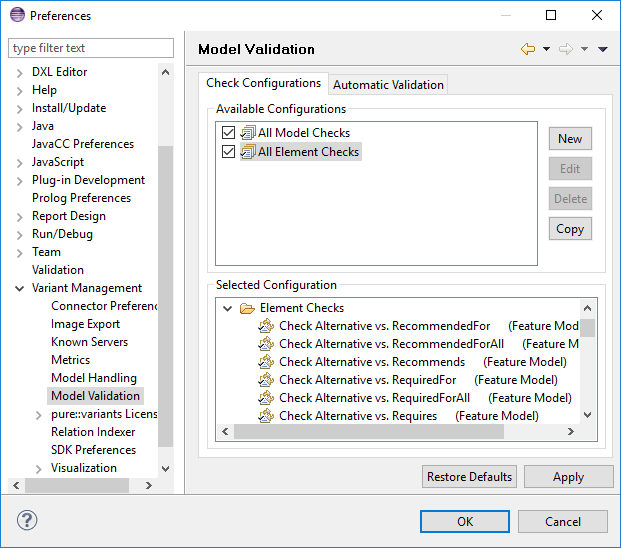
The two default configurations "All Model Checks" and "All Element Checks" are always available. "All Model Checks" contains all model checks that perform whole model analyses. Compared with "All Element Checks" containing all checks that perform analyses on element level. The configuration "All Element Checks" is enabled per default if the pure::variants perspective is opened the first time.
A model check configuration is activated by selecting it in the Available Configurations list. If more than one configuration is selected, the checks from all selected configurations are merged into one set that becomes activated.
The checks contained in a configuration are shown in the
Selected Configuration
list by clicking on the name of the configuration.
The checks are listed by its names followed by the list of model
types supported by a
check. Additionally the icon![]() reveals if the check is enabled for automatic
model validation (seethe section called “Performing Model Checks”
). A brief
description of a check is shown by moving the mouse pointer over the check
name.
reveals if the check is enabled for automatic
model validation (seethe section called “Performing Model Checks”
). A brief
description of a check is shown by moving the mouse pointer over the check
name.
All but the two default configurations "All Model Checks" and "All Element Checks" can be deleted by clicking first on the name of the configuration and then on button .
A new configuration can be created by clicking on button . This will open the New Check Configuration dialog as shown in Figure 6.30, “New Check Configuration Dialog” .
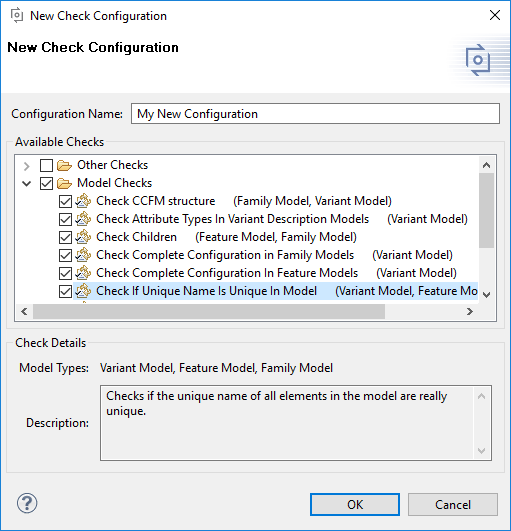
For a new check configuration a unique name for the configuration has to be entered. The available checks are shown in the Available Checks tree and can be selected for the new configuration by clicking on the check boxes of the checks. Clicking on the root of a sub-tree selects/deselects all checks of this sub-tree.
Detailed information about a check are displayed in the Check Details area of the dialog if the name of a check is selected. The Model Types field shows the list of model types for which the corresponding check is applicable. TheDescription field shows the description of the check.
The same dialog appears for editing and copying check configurations using the and buttons. Only non-default configurations can be edited.
And with the "Enable check for..." button (or clicking on the icon
![]() of a check)
of a check)
On the Automatic Validation tab it can be configured which checks are allowed to be performed automatically (see Figure 6.31, “Automatic Model Validation Preferences Page” ). If the automatic model validation is enabled, after every change on the model those checks are performed from the active check configurations that are enabled for automatic model validation.
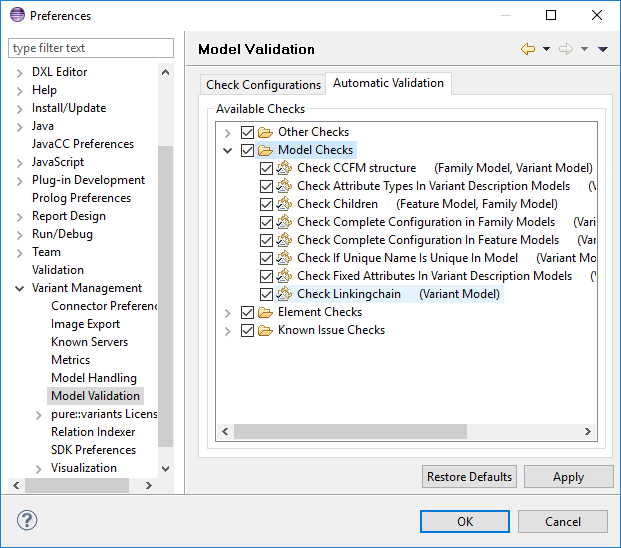
The Available Checks tree shows all known checks independently from the selected check configuration. Clicking on the check box of a check toggles the automatic validation state of the corresponding check. Clicking on the root of a sub-tree toggles all checks of this sub-tree.
A description of the check is shown by moving the mouse pointer over the check name.
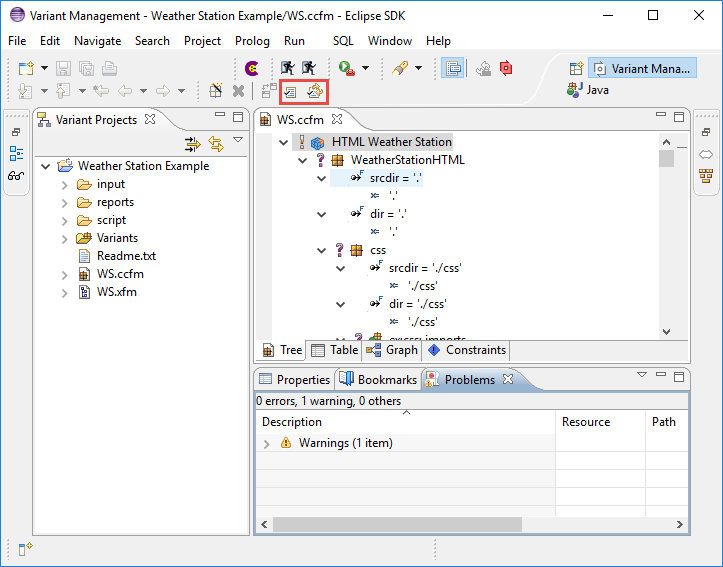
A model can be checked using the selected model check
configurations by opening the
model in a corresponding model editor and pressing button
 in the tool bar. This will start a
single model validation cycle. The progress of the model validation is
shown in the
Progress view.
in the tool bar. This will start a
single model validation cycle. The progress of the model validation is
shown in the
Progress view.
If no model check configuration is selected a dialog is opened inviting the user to choose a non-empty check configuration. This dialog can be disabled by enabling the "Do not show again" check box of the dialog.
The button
![]() is used
to enable automatic model checking, i.e. after every change on the
model a new check
cycle is started automatically. In contrast to the single model
validation cycle only
those checks are performed from the active check configurations that
are enabled for
automatic model validation. Automatic model validation is enabled by
default.
is used
to enable automatic model checking, i.e. after every change on the
model a new check
cycle is started automatically. In contrast to the single model
validation cycle only
those checks are performed from the active check configurations that
are enabled for
automatic model validation. Automatic model validation is enabled by
default.
The result of a model check cycle is a list of problems found in the model. These problems are shown in the Problems view and as markers on the model. A list of quick fixes for a problem can be shown either by choosing "Quick Fix" from the context menu of the problem in the Problems view or by clicking on the corresponding marker on the model. For some problems special quick fixes are provided fixing all problems of the same kind.