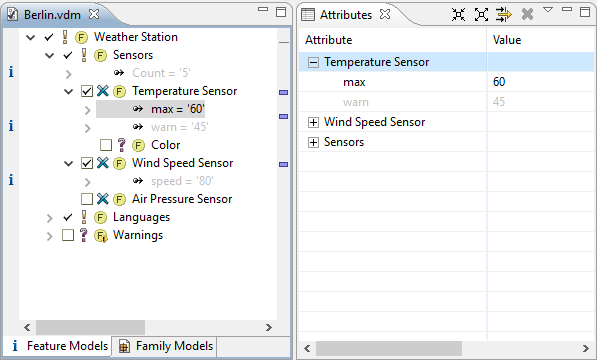
The attributes view shows for a VDM the available attributes of the associated Feature and Family Models. The user can set the value of non-fixed attributes in this view by clicking in the Value column of an attribute. If no value is set for an attribute then the value set in the associated Feature / Family Model is shown in grey in the Value column. This view may also be filtered to show only the attributes of selected features and/or where no value has been set.
The model editors and most of the views support named layouts and filters. The Visualization view shows all named layouts and named filters defined in the current Eclipse workspace (see Figure 7.27, “Visualization view (left) showing 2 named filters and 2 named layouts” ).
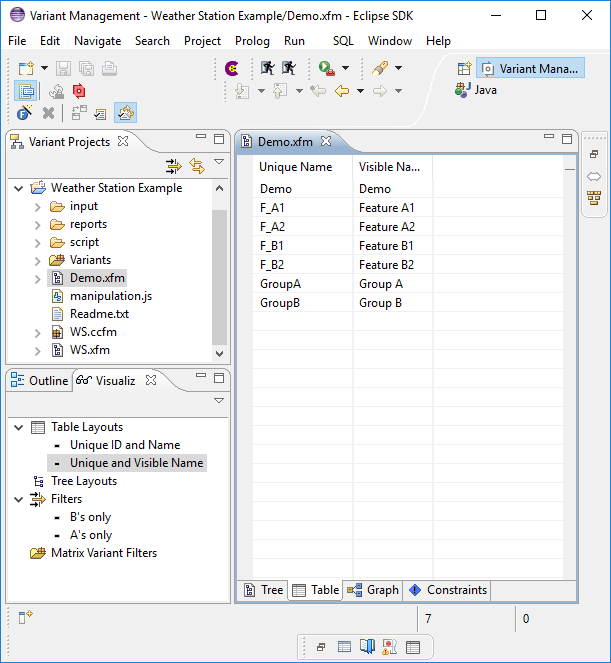
When the Visualization view is opened, the first level of layouts and filters is expanded. To expand or collapse the visualizations manually use the "Expand.." and "Collapse.." buttons in the tool bar of the view. Additional filters and layouts may be imported from a file by choosing "Import" from the context menu. To export all visualizations listed in the Visualization view choose "Export" from the context menu. Exported visualizations are stored in a file which can be imported into another Eclipse installation or shared in the project's team repository. Visualizations can be applied either by double clicking on the name of the visualization or by choosing "Apply Item" from the context menu of a visualization. Other actions on visualizations are Delete and Rename by choosing the corresponding context menu entries.
Three top-level categories are available in the visualization view. These are Filters , Table Layouts and Tree Layouts . The corresponding items can only be created in the editors. See the section called “ Table Editing Page ” , the section called “ Tree Editing Page ” and Section 6.9, “ Filtering Models ” for information on it. Tree Layouts can only be applied to Editors Tree Viewers, Table Layouts to Editors Table Viewers and Filters to all pure::variants Model Editors. Note that some filters may not work as expected on different models. For example a Variant Model Filter, filtering on selections will not work for a Feature Model Editor.
Additionally the layout and filter items may be organized within categories. Layouts or filters, created once appear at first directly below their top-level category. The view allows to create a category by choosing "Create Category..." from the context menu on a parent Category. The context menu provides an action "Move To" on an item selection, which allows to move it to any desired category.
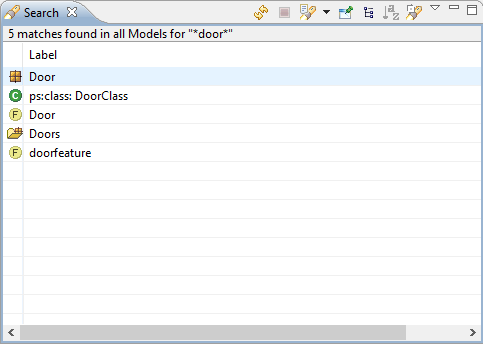
Feature and Family Models can be searched using the Variant Search dialog. The Variant Search view shows the result of this search and is opened automatically when the search is started. The search results are listed in a table or in a tree representation.
The tree representation structures the search results in a simple tree. The first level of the tree lists the models containing matches. On the second level the matched elements are listed. The next levels finally list the matched attributes, attribute values, restrictions, and constraints.
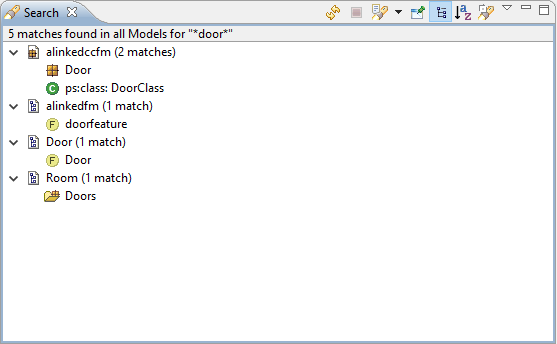
Behind every element in the tree that is a root element of a sub-tree the number of matches in this sub-tree is shown. Double-clicking on an item in the tree opens the corresponding model in an editor with the corresponding match selected. The search results can be sorted alphabetically using the button "Sort by alphabet" in the tool bar of the Search view.
By pressing button "Switch to Table" the table representation of the seach results is enabled. The table shows the matched model items in a flat list. Double-clicking on an item in the list opens the corresponding model in an editor with the corresponding match selected. The search results can be sorted alphabetically by clicking on the "Label" column title.
A search result history is shown when the button "Show Previous Searches" in the tool bar of the search view is pressed. With this history previous search results can be easily restored. The history can be cleared by choosing "Clear History" from the "Show Previous Searches" drop down menu. Single history entries can be removed using the "Remove" button in the Previous Searches dialog.
Note
The history for many consecutive searches with a lot of results may lead to high memory consumption. In this case clear the whole history or remove single history entries using the Previous Searches dialog.
A new search can be started by clicking on button "Start new Search".
For more information about how to search in models using the Variant Search see Section 6.7, “ Searching in Models ” .
The Outline view shows information about a model and allows navigation around a model. The outline view for some models has additional capabilities. These are documented in the section for the associated model editor.
pure::variants uses the standard Eclipse Problems View to indicate problems in models. If more than one element is causing a problem, clicking on the problem selects the first element in the editor. For some problems a Quick Fix (see context menu of task list entry) may be available.
pure::variants uses the standard Eclipse Properties View. This view shows important information about the selected object and allows editing of most property values. To open the view chose menu Window->Show View->Properties .
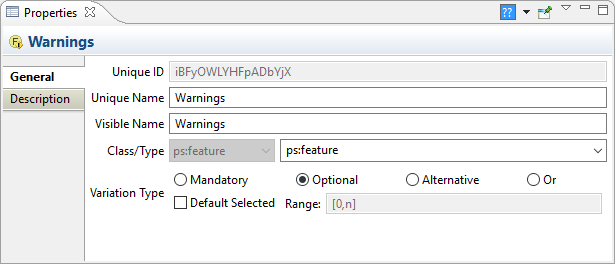
Figure 7.30, “Properties view for a feature” shows the properties view after a feature was selected in the Feature Model Editor. At the left side there are selectable tabs, each containing a set of properties that logically belong together. Usually, tabs General and Description are shown. The middle area of the properties view presents the properties for the active tab.
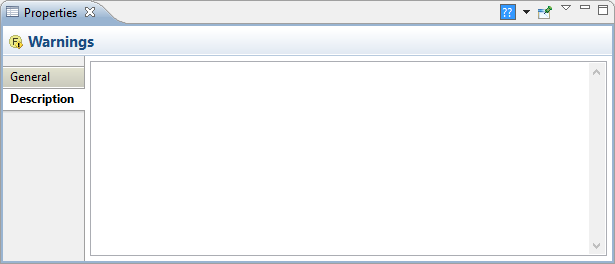
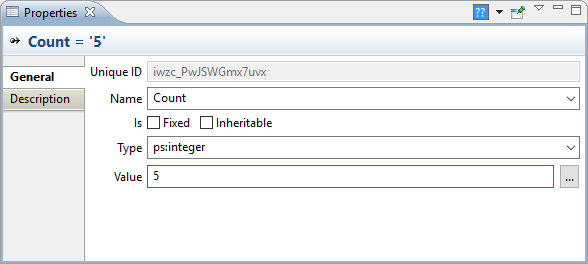
The properties view depends on the selection in the workbench made by the user. For instance, selecting a family element like a component allows to edit unique and visible names, whereas for a selected relation the type and the relation targets can be changed in the General tab. At the moment, general properties of elements, relations, attributes, attribute values and restrictions can be modified and each of them can have descriptions given in the Description tab (see Figure 7.31, “Description tab in Properties view for a relation” ).
Properties that are edited won't be applied until the edited field loses the input focus or the ENTER key is pressed. That allows you to discard the current change in a text field with the ESCAPE key if you like.
If a VDM Editor is active in the workbench and an attribute of the variant is selected then the properties view allows to define the value of the attribute for that variant.
For the visible name of features and family elements as well as for descriptions it is possible to specify text in different languages. See Section 6.12, “ Using Multiple Languages in Models ” for more information about language support. For formatted text editing of descriptions see Section 7.5.1, “ Common Properties Page ” .
The Relations view shows the relations of the currently selected element (feature/component/part/source element) to other elements. The relations shown in the view are gathered from different locations. The basic locations are:
- Model Structure
From the model structure, the relations view gathers information about the parent and child elements of an element.
- Element Relations
From the relations defined on an element, the relations view gathers information about the elements depending on the selected element according to the defined relations. Related elements can be elements from the same model or from other models. If a relation to an element of another model cannot be resolved, it may be necessary to explicitly open the other model to let the relations view resolve the element.
- Restrictions
From the restrictions defined on an element or on a relation, property, or property value of the element, the relations view gathers information about the elements referenced in these restrictions. According to the language used to formulate the restriction, pvSCL, the relations view shows the referenced elements below the entry "Simple Constraint Language".
- Constraints
From the constraints defined on an element, the relations view gathers information about the elements referenced in these constraints. According to the language used to formulate the constraint, pvSCL, the relations view shows the referenced elements below the entry "Simple Constraint Language".
- Element Properties
From the properties of an element, the relations view gathers information about mapped features. For this purpose there must be a property with the value type "ps:feature". Mapped features can be elements from the same model or from other models. If the mapped feature is an element of another model, it may be necessary to explicitly open the other model to let the relations view resolve the element.
The relations view can be extended to view other relations than the basic relations described above. Please see the pure::variants Extensibility Guide for more information about extending the relations view.
Double-clicking on a related element shown in the Relations View
selects that element
in the editor. The small arrow in the lower part of the relation icon
shows the direction
of the relation. This arrow always points from the relation source to
the relation
destination. For some relations the default icon
 is shown. The number in parentheses shown after an
element's name is the count of child relations. So, in the figure below the
element has
one requires relation indicated by
(1)
.
is shown. The number in parentheses shown after an
element's name is the count of child relations. So, in the figure below the
element has
one requires relation indicated by
(1)
.
Figure 7.33. Relations view (different layouts) for feature with a ps:requires to feature 'Main Component Big'
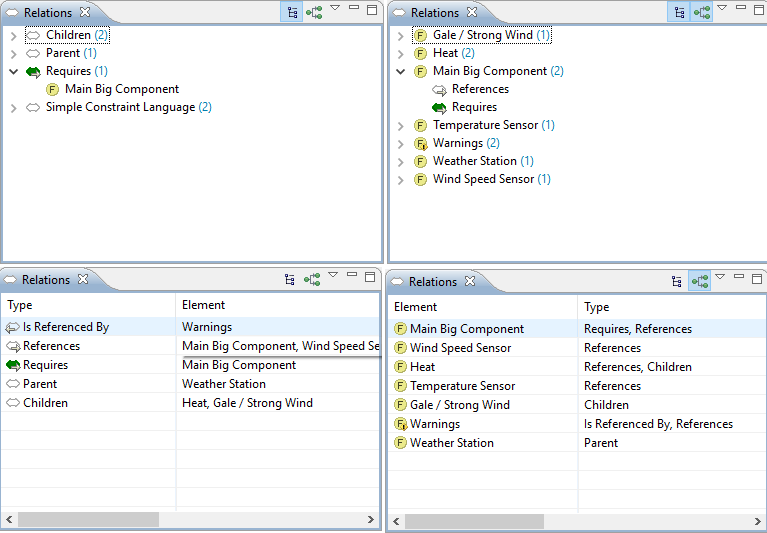
The Relations view is available in four different layout styles: two tree styles combined with two table styles. These styles are accessed via icons or a menu on the Relations view toolbar.
The relations view supports filtering based on relation types. To filter the view use the Filter Types menu item from the menu accessible by clicking on the down arrow icon in the view's toolbar.
Attribute values of type "ps:url" are shown as links to external documents in the relations view. A double-click on the appropriate entry opens the assigned system application for the referenced URL.
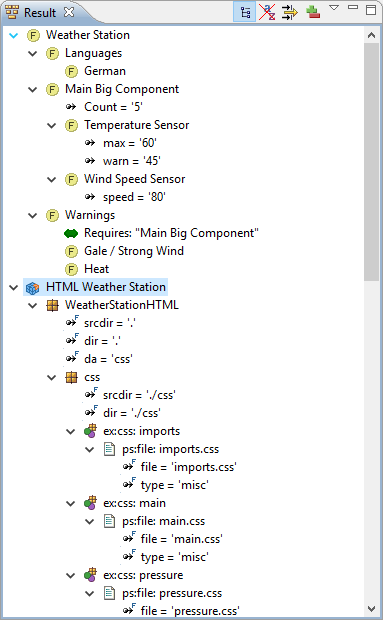
The result view shows the results of model evaluation after a selection check has been performed. In full configuration mode, it lists all selected Feature and Family Model elements representing the given variant. In partial configuration mode, it lists both selected and open Feature and Family Model elements of the given variant.
The result view also provides a special operation mode where, instead of a result, the difference (delta) between two results are shown, similar to the model compare capability for Feature and Family Models.
Toolbar icons allow the view to be shown as a tree or table (
 ), allow the sort direction to be changed (
 ), and control
activation/deactivation of the result delta mode (
), and control
activation/deactivation of the result delta mode (
 ).
).
Filtering is available for the linear (table like) view, (
 ). The
Model Visibility
item in the
result view menu (third button from right in toolbar) permits selection
of the models to
be shown in the result view.
). The
Model Visibility
item in the
result view menu (third button from right in toolbar) permits selection
of the models to
be shown in the result view.
The result view displays a result corresponding to the currently selected VDM. If no VDM is selected, the result view will be empty. The result view is automatically updated whenever a VDM is evaluated.
The result delta mode is enabled with the plus-minus button (
) in the result view's toolbar. In this
mode the view displays the difference between the current evaluation
result and a
reference result
- either the result of the previous evaluation
(default) or an evaluation result set by the user as a fixed reference . In
the first
case, the reference result is updated after each evaluation to become
the current
evaluation result. The delta is therefore always calculated from the last
two evaluation
results. In the second case the reference result does not change. All
deltas show the
difference between the current result and the fixed reference result.
The fixed reference can be either set to the current result or can be loaded from a previously saved variant result (a .vrm file). The reference result is set from the result view menu (third button from right in toolbar). To set a fixed result as reference use Set current result as reference . To load the reference from a file use Load reference result from file . To activate the default mode use Release reference result . The Switch Delta Mode submenu allows the level of delta details shown to be set by the user.
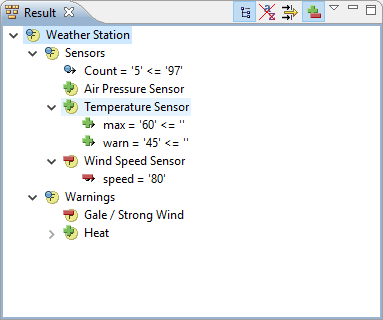
Icons are used to indicate if an element, attribute or relation was changed, added or removed. A plus sign indicates that the marked item is only present in the current result. A minus sign indicates that the item is only present in the reference result. A dot sign indicates that the item contains changes in its properties or its child elements. Both old and new values are shown for changed attribute values (left hand side is new, right hand side is old).
Variant description models are used to configure variation points in pure::variants. These vdms are connected to a configuration space, which lists all input models. Variation points can be either feature-based or manually configured. The feature-based configuration is used to automatically configure variation points based on selections of features. The feature-based configuration depends directly on the inout models of the configuration space. Changing the input models may have an impact on the existing variation point configurations.
The impact view shows possible impacts on the variant configurations while changing the input models.
To open the Impact View use the Show View -> Impact View action form the Window menu.

After opening the view work on the input models can be started. The
impact analysis is
disabled by default and needs to be explicitly enabled for each input
model, which shall
be considered by the impact analysis. To enable the analysis open an
input model and click
on the
Enable Imput Analysis
button (
 ). The initial analysis is performed now for all variant
models, which use the input model. The impact view shows the state of each
variant model
after the analysis is done. There are 5 different states:
). The initial analysis is performed now for all variant
models, which use the input model. The impact view shows the state of each
variant model
after the analysis is done. There are 5 different states:
 the variant
is currently analysed by the impact analysis
the variant
is currently analysed by the impact analysis
 the
variant is valid and not changed by the input model changes
the
variant is valid and not changed by the input model changes
 the
variant is valid but changed by the input model changes
the
variant is valid but changed by the input model changes
 the variant is
invalid
the variant is
invalid
 the variant
is deactivated
the variant
is deactivated
The impact is calculated automatically for every change on the
input models, for which
the impact analysis is activated. With the
 button the automatic calculation can be paused, if
the user is performing a lot of changes and can be resumed after the
changes are done.
Reseting the impact analysis is triggered with the
button the automatic calculation can be paused, if
the user is performing a lot of changes and can be resumed after the
changes are done.
Reseting the impact analysis is triggered with the
 button. This removes the current analysis result and
starts a fresh calculation of the impact. The result is the same as
enabling the impact
claculation the first time on the current state of the input models.
button. This removes the current analysis result and
starts a fresh calculation of the impact. The result is the same as
enabling the impact
claculation the first time on the current state of the input models.
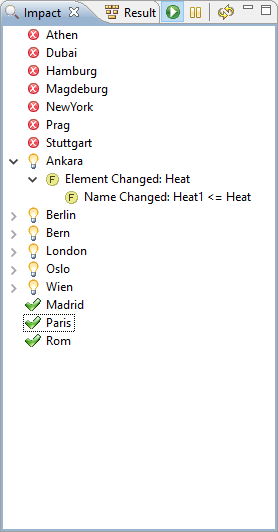
Figure Figure 7.37, “Impact Calculation Result” shows an example result for the impact analysis. If there are problems the result contains details on the problem. The same applies to changes in the variant description models. For changes it is possible to see more details with the action Show in Text Compare from the context menu of one change.
The context menu of the impact view allows the user to change the scope of the impact analysis. The Actions in sub menu Add Variant Models allows the user to add additional variant models to the analysis. Remove Variant Model removes the selected models from the impact analysis. Deactivate deactivates the analysis for the selected variant models. This action keeps them in the impact view and just ignores them during calculation.

Navigation from the information shown in the impact view to the corresponding elements or models is enabled using the Go to ... action from the context menu or by just double clicking the elements or models in the impact view.
Writing complex pvSCL rules in the modal Code Editor dialog is notvery comfortable since it is not possible to look at your feature models until you closed the dialog. To avoid that you can use the pvSCL IDE view to prepare the pvSCL rules and than just copy them to the Code Editor after you have finished them.
Essentially, the pvSCL IDE is a live expression evaluator which can be used to successfully developed large and complex expressions with it.
It is used in three steps.
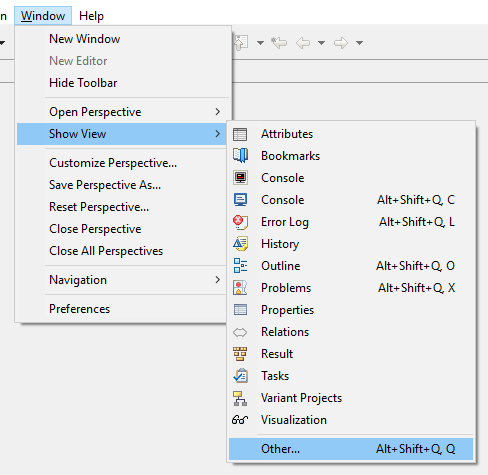
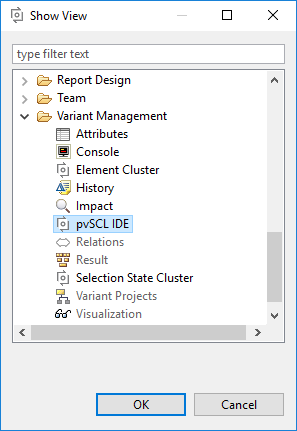
Step 1: Open the pvSCL IDE view. Go to Window -> Show View -> Other and chose pvSCL IDE in the opening dialog. After ending this dialog the pvSCL IDE view opens.
Step 2: Select an element as expression context in a variant model. This initializes the evaluation ontext for the pvSCL IDE. This usually should be the element, which will be the parent of the constraint, restriction or calculation.
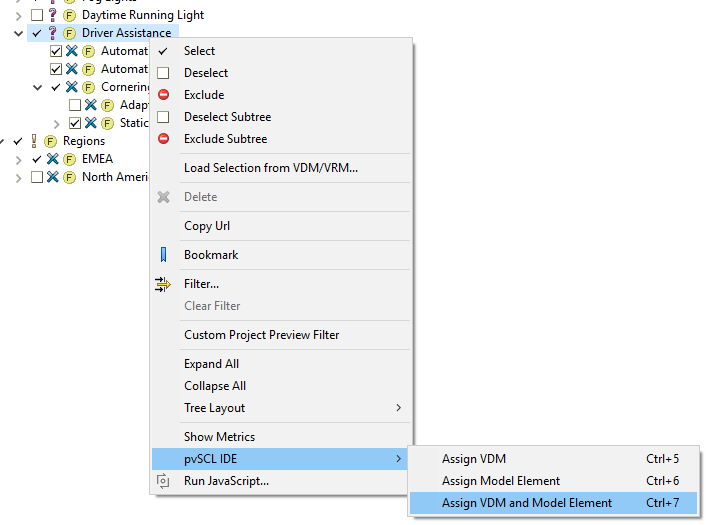
To do so, right-click on the element, select pvSCL IDE --> Assign VDM and Model Element. Alternatively you can press [Ctrl]+[7].
Step 3: Enter your expression in the Code Editor part of the pvSCL IDE.
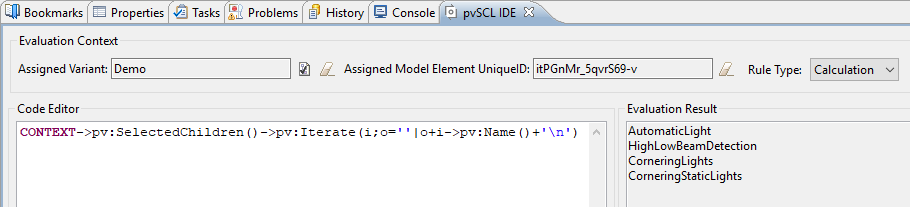
Enter the text of your pvSCL expression. You can use auto-completion using [Ctrl]+[Space], as usual. You also have on-the-fly syntax and error highlighting. The expression in the Code Editor is evaluated on the variant model immediately as you type. The result appears on the right side instantly.
Make sure you use the rigth rule type setting. The rule type constraint and restriction have a result of type ps:boolean only. Calculations on the pther hande can also have results of other types.
If the evaluation of your expression would generate error, warning or information marker the Evaluation Result control will indicate that with a small marker at the top left corner of the control.
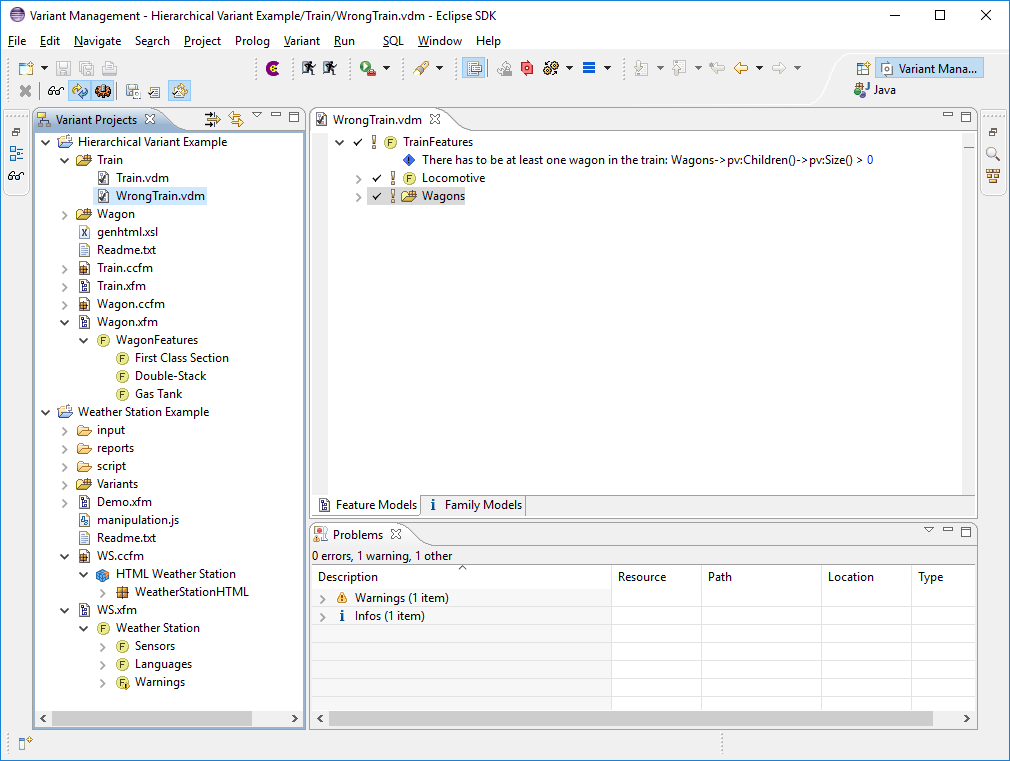
The Variant Projects View (upper left part in Figure 7.43, “The Variant Projects View” ) shows all variant management projects in the current workspace. Projects and folders or models in the projects can be opened in a tree-like representation. Wizards available from the project's context menu allow the creation of Feature Models, Family Models, and Configuration Spaces. Double-clicking on an existing model opens the model editor, usually shown in the upper right part of the perspective. In Figure 7.43, “The Variant Projects View” one editor is shown for a variant description model with some features selected.